If you are an Android user, these tips and tricks are for you, You can surprise your friends after following these 06 top android advance tricks, also read my old android related article these articles are awesome
First Step: Install GNURoot from the Google Play Store
The first & foremost step is to install the free Android app GNURoot on your Google play store. This application installs a fake Linux root file system in your Devices. Just click and open the Play Store, search for GNURoot & install the main GNURoot app from your Android device Google play store.

Step 2: Choice the helper app of a Linux distro
By default, the GNURoot offers different ARM-based Linux distros Debian Wheezy & Fedora and Aboriginal (a lightweight BusyBox variant) & Gentoo. Select any one of these & click “Create New Rootfs” to download the needed all files.
This process may take a few minutes, so wait for a few.

Step 3: Select the Linux distro & launch it
while the download is completed, the choice that distro from the second drop-down option. After right ticking the Launch as Fake Root box to get the apt-get & other root commands, tap “Launch Rootfs” to install & use Linux on Android phone.
Step 4: Its Start to use GNURoot
After the installation complete, you are ready to use Linux on your Android phone. Now you should be able to install any package from your distro’s repo using the relevant package manager by to type command apt-get for Wheezy or yum for Fedora.
You can create extra terminal windows by tapping on the plus[+] button at the top & switch using the top-left drop-down menu.
To access the menu options for various settings, you can click on the top-right icon & other options.
Also Read: Some Amazing Android tricks 2019 should you know?
The first
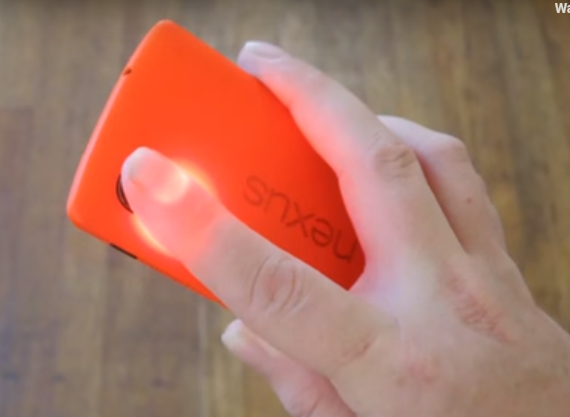
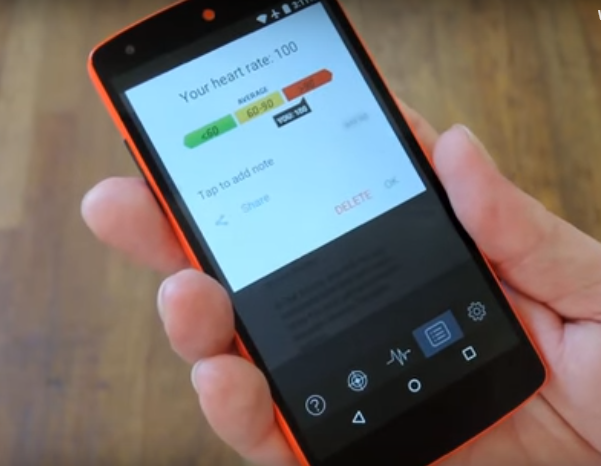
download the app on our list is called Instant Heart Rate, & like the rest of these options, it's completely available for free on the Google Play Store.note: If you open the App and open it will understand how to use it


Tweak the Status Bar using System UI Tuner
Step 1:
First, you need to Create a Widget on your phone screen
The first step, you'll need to create a widget using an activity launcher on your phone. There are dedicated activity launcher your phone apps, but we've found most of them to be incompatible with Smart Android Pie at this time. So your top bet is to use the Nova Launcher, this launcher has includes an activity launcher feature.
Now Download and Install Nova Launcher for free from the Google Play Store
Also, Read Top 6 Android Advance Game Hacking Apps 2019 Root | Noon Root
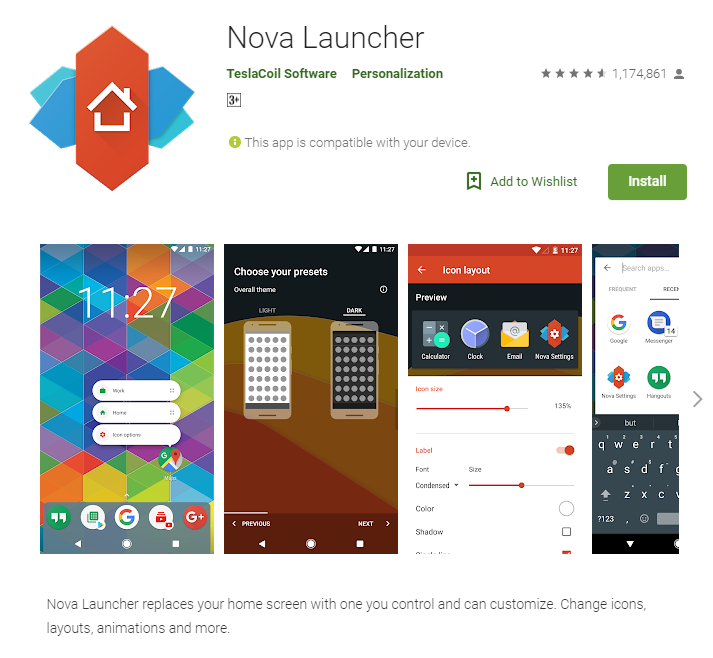
When Nova-launcher opened, long-press the home screen & choose "Widgets." There is a section for widgets created by the Nova Launcher app when it an option is known as "Activities." touch this option, then scroll down & click on "System UI, " then you choose "System UI demo mode" at the bottom.

Step 2:
Launch the System UI Tuner on your phone
Next step, click on the widget to launch the main menu. You will be presented with 2 options here, "Status bar" & "Do not disturb." The former will manage which icons appear on the status bar on your phone.
To disable any status bar option your device, simply you need to turn off the toggle switch next to it. Battery & Time are the only two options without a toggle. Battery opens a popup menu show and with options on whether to display the battery % only during charging or always. Time will launch a popup menu where you have the option to display not just hours & a few minutes, but seconds as very well.

Step Last:
Under the "Do not disturb, " there is only one option you have: "Volume + and - buttons shortcut." When completely disabled, you need able to enter DND mode by lowering the volume to zero, then pressing volume down [-] one more time.

When System UI Tuner isn't as robust as it once was, it still offers to you great tools when it comes to customizing your Android phone experience. Although it has the latest method to access it, it is still worth unlocking to clean up your status bar & to prevent accidental activation of Do Not Disturb mode.
Don't Miss My Old Art: Facebook Night Mode Enable
How to enable Find My Device on your any phone
In latest Android phones, a shortcut to the Find My Device service is already located conveniently in your Latest Android Settings app, but you might still need to download Find My Device from Your Google Play Store to get it set up. There are just a couple of things you'll need to activate and find your phone anywhere.
Launch Your Settings.click on Security and lock screen.
then click on Device administrators.

Then tap on Find My Device so that a checkmark appears in the checkbox.
click on the back button in the top+ left corner of your screen.
then you click the back button again in the top left corner to back to the main Settings menu.
Also. Read [10 Awesome Android Launchers 2019 updated]

press on Location in the main Settings menu.
tap on the switch beside Location menu at the above of the screen so that it turns on.
click on the Mode option.

Tap on the High accuracy so the circle is filled in.
then click the back button in the top left corner.
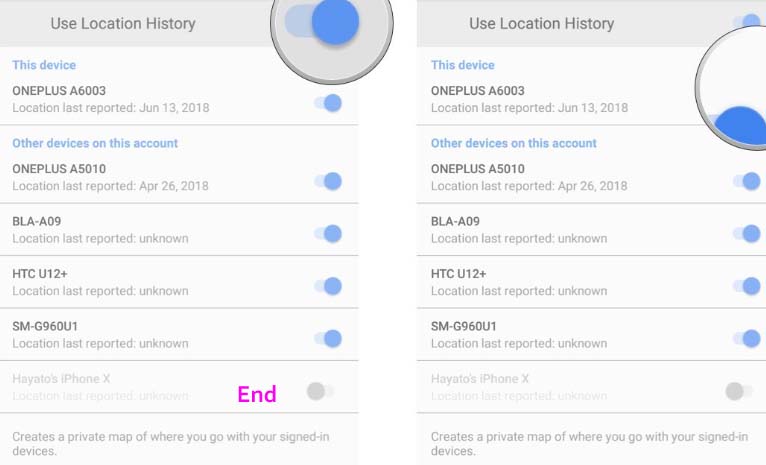
and click Google Location History.

click on the switch beneath Location History so that it started.
click the switch beside your device so that it starts up.
See back the Notifications you Swiped Away
The Android notifications log was first introduced all the way back with Android 4.3 Jellybean, & is still accessible from Android phone Lollipop through Android Pie.
you can see all the system notification, but it is only allowable through an almost-secret widget. On many Android phones, it seems that you need to enable the Developer Options that phone first to unlock the widget & retrieve your lost notifications.
To unlock your developer options,
First, go into your phone Settings > About Phone & then click on the > Build number several times. After 3 or 4 clicks, then you'll get an on-screen notification letting you know you are now on a developer (it also added a new section in your Settings menu).
How to recover permanently lost notifications on Android
Once you're in the notification log then you see active notifications in white & notifications that you closed in gray. You can click the gray notifications just as you would normally, & you'll be taken straight to the source of the notification.
Use the Navigation-Buttons as App shortcuts
Install Button Mapper on your phone
Button Mapper app was in beta, but now you can use and install the app without joining the beta program. Just note you that this app is still in its infancy, hence why it says "Unreleased" on the Google Play, so it could still have those beta jitters.
Install Button Mapper for free from on the Google Play Store

Enable the Accessibility on the Plugin
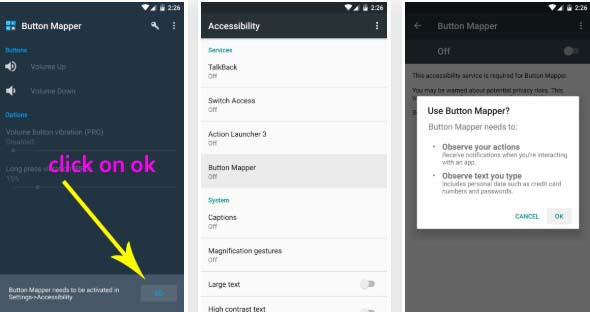
When you first install and launch Button Mapper, you'll have to do some initial setup on this app. To start, tap the "Go" button on the screen message at the bottom of your phone screen. From here, choose the "Button Mapper" option from the list, then enable the app Accessibility plugin with the switch at the above of the screen, & press "OK" on the popup.
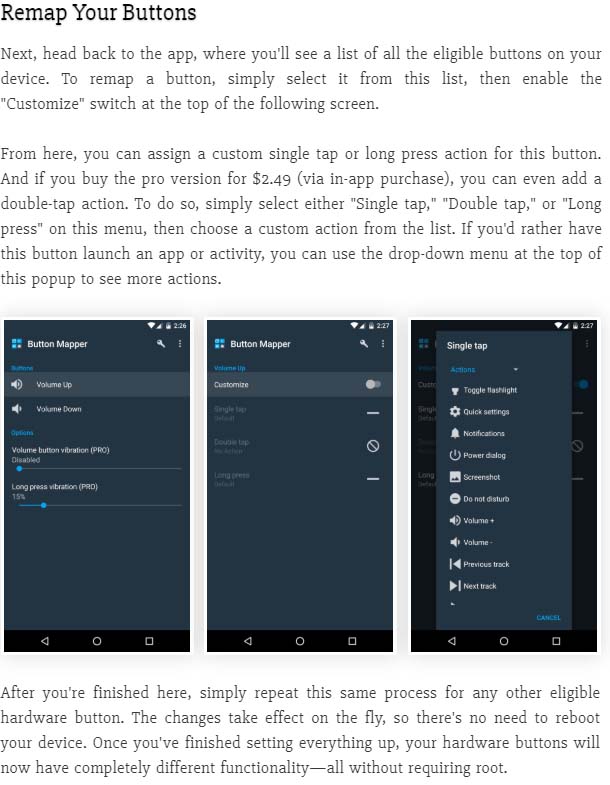
When you're complete here, simply again this same process for any other eligible hardware button. The changes will take effect on the fly, so there's no need to reboot your android device. Once you've completed setting everything up,
আমি অলিদুর রহমান। বিশ্বের সর্ববৃহৎ বিজ্ঞান ও প্রযুক্তির সৌশল নেটওয়ার্ক - টেকটিউনস এ আমি 6 বছর 9 মাস যাবৎ যুক্ত আছি। টেকটিউনস আমি এ পর্যন্ত 42 টি টিউন ও 5 টি টিউমেন্ট করেছি। টেকটিউনসে আমার 1 ফলোয়ার আছে এবং আমি টেকটিউনসে 3 টিউনারকে ফলো করি।
My name is Olidur Rahman, I love technology, Stay tuned with us to know more about Mobile and Computer, tips and tricks should you know because This is technology time and this is my website: https://www.techadvancefree.com/ https://www.techyeyes.com/