আপনাদের সকলকে শুভেচ্ছা জানিয়ে শুরু করছি আমার আজকের টিউন। আজকে আমি আপনাদের সাথে যে সফটওয়্যারটি শেয়ার করব তার নাম হল Drive SnapShot. এই সফটওয়্যারটির সাহায্যে আপনি C drive-এর হুবহু ইমেজ নিতে পারবেন অথাৎ আপনার C drive-এর বেকআপ নিতে পারবেন। এর মাধ্যমে operating system চালু অবস্থায় বেকআপ নেয়া যায়।
এক নজরে এর ফিচারগুলো দেখে নিই-
Features:
• Create Disk Image Backups, while running Windows
• There is no restart (to DOS) necessary. Never.
• Continue your work, while the Backup is in progress
• The new Snapshot technology ensures, that all data are consistent, and reflect the PC's data at the start of backup. There are no difficulties with opened files. Never.
• This enables a very fast and easy way to backup servers and other computers, that must run 24 hours a day.
• Easy Use and Restore of single Files or directories
• Drive Snapshot creates a virtual drive, containing all your drives data. You may use, compare, or restore these files directly from the Disk Image file.
• This works with any program of your choice, including (of course) the Windows Explorer
• Complete Restore of a disk in case of Disaster
• If a disk is restored to it's original state, it will be exactly the same as at the time of Backup - byte for byte.
• Restoring a system partition will require DOS; other drives can be restored using
Windows:
• Compatible to all Windows file systems (FAT16, FAT32, NTFS)
• Compatible to all Windows RAID Methods
• Very easy and comprehensive command line interface
• This makes automation of regular tasks a breeze.
Homepage - http://www.drivesnapshot.de/
আসুন এবার দেখে নিই এর কাযপদ্ধতিগুরলো-
ডাউনলোড: সফটওয়্যারটি ডাউনলোড করে ইন্সটল করে নিই এবং সাথে দেওয়া কীজেন দিয়ে রেজিস্টার করে নিই।
১) সফটওয়্যারটি ওপেন করে নিচের (১)নং ছবির মত “Backup Disk To File”-এ ক্লিক করি।

২)এবার (২)নং ছবির মত যে ড্রাইভ-এর বেকআপ নিবেন তা সিলেক্ট করে (৩)নং ছবির মত Next-এ ক্লিক করি।

৩) এবার বেকআপটিকে যেখানে সেভ করবেন তা (৪)নং ছবির মত ব্রাউজ করে দেখিয়ে দিয়ে (৫)নং-এর মত start copy-তে ক্লিক করি। তাহলে আপনার বেকআপ প্রসেসিং শুরু হবে।

৪) বেকআপ প্রসেসিং শেষ হলে (৬)নং এর মত ok বাটনে ক্লিক করলেই কাজ সম্পন্ন হয়ে যাবে।

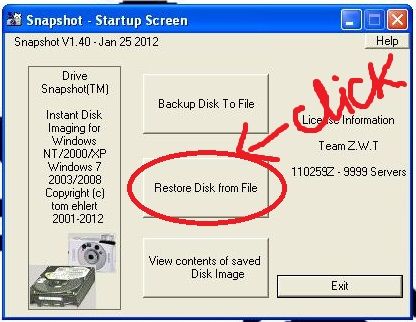
১) সফটওয়্যারটি ওপেন করে নিচের ছবির মত “Restore Disk from File”-এ ক্লিক করি।

২)এবার ছবির মত (১)নং-এ browse করে বেকআপ ফাইলটি দেখিয়ে দিয়ে (৩)নং-এর মত Next-এ ক্লিক করি।

৩) এবার বেকআপ ফাইলটি যে ড্রাইভ-এ রিস্টোর করব তা ছবির (৪)নং-এর মত ড্রাইভটি সিলেক্ট করে (৫)নং-এর মত Next –এ ক্লিক করি।

৪) এরপর ২ বার yes বাটনে ক্লিক করি, ফলে কম্পিউার রিস্টাট হয়ে রিস্টোর হওয়া শুরু হয়ে যাবে। রিস্টোর হয়ে গেল কী-বোডের যেকোন কী প্রেস করলে কম্পিউটার পুনরায় রিস্টাট হয়ে চালু হয়ে যাবে।
আমি সাইমুন। বিশ্বের সর্ববৃহৎ বিজ্ঞান ও প্রযুক্তির সৌশল নেটওয়ার্ক - টেকটিউনস এ আমি 15 বছর 12 মাস যাবৎ যুক্ত আছি। টেকটিউনস আমি এ পর্যন্ত 43 টি টিউন ও 447 টি টিউমেন্ট করেছি। টেকটিউনসে আমার 0 ফলোয়ার আছে এবং আমি টেকটিউনসে 0 টিউনারকে ফলো করি।
I love Bangladesh
thanks for share. This method is very simple.